
![]()
Relay Removal
Removing the PGM-Fi Main Relay on a MK2 CRX.
The steps below show removal of the relay from a right-hand drive MK2 CRX/Civic, however the steps are exactly the same for the left-hand drive model, but mirrored.
On most other Honda's the main relay is usually located in or near the fuse box area and due to its size is quite easy to find.
Tools Required:
- Cross-head screwdriver.
- 10mm Socket.
- Extension bar for above.
- Ratchet for above.
- 10mm Ring spanner (preferably ratchet type).
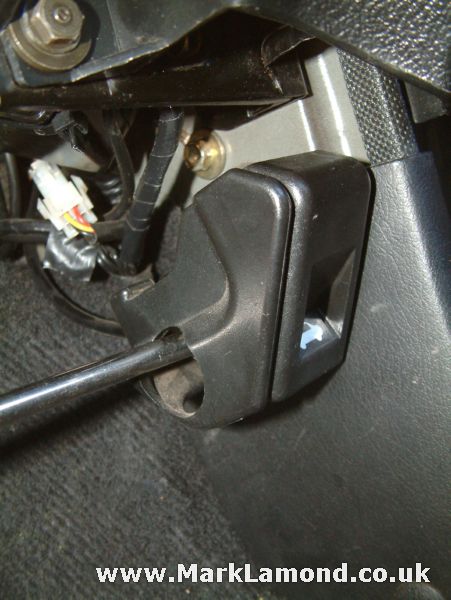 |
1. Remove the bonnet lever with a 10mm socket and extension bar. There are two bolts, the bottom one is being removed in the picture. When the bolts are out the level will fall out of the way. |
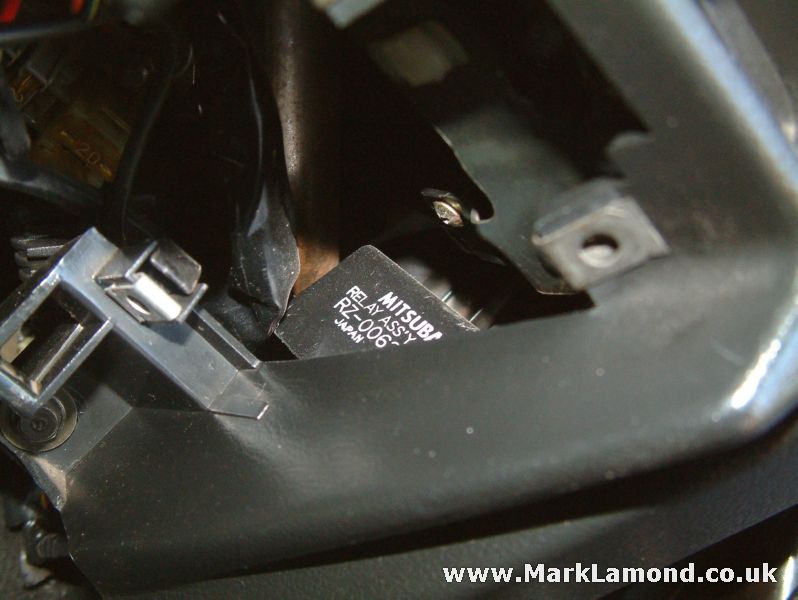 |
2. Remove your fuse box cover to gain access to the coin holder. Now remove the coin holder - spring it open and you will see two screws at the top and one at the bottom. When the holder is out of the way we can see the top of the relay. |
 |
3. The bolt securing the relay is well hidden, you can access it from the directly above the bonnet catch. The bolt is impossible to see unless you get your head in the foot well so just use have a feel for it. |
 |
4. A ratchet spanner greatly speeds up removing the relay although it is possible with a normal ring spanner but it will take a few minutes. Do NOT try to use a open-ended spanner as you will probably round the bolt! Only use a ring-spanner if you do not have a ratchet one! |
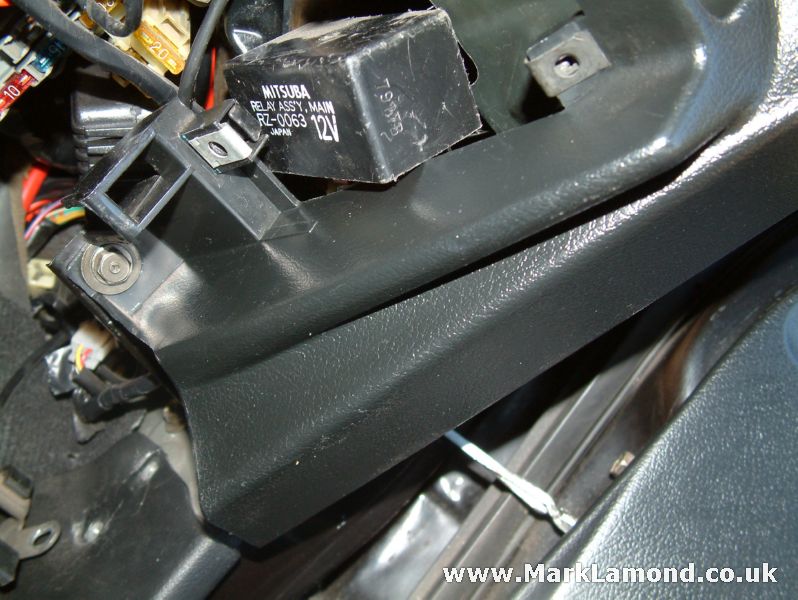 |
5. With the bracket loose we can now lift out the relay. Along with the bolt the bracket is hooked with a tag so you may have to wiggle it a bit to free it off or it might just lift straight out. |
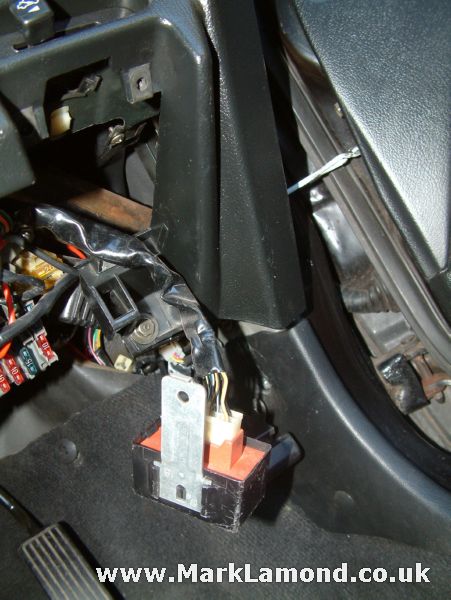 |
6. The relay will now lift out - it is fitted with a long lead so you can easily get into the connector, and unplug it. |
Fitting the relay back in is the reverse of removal, however getting the bolt back in can be a little tricky. Remember to slot the notch on the relays bracket back into the hole on the car as this will hold the relay in the exact position for the bolt to go in.